Microsoft has made some helpful updates to their video storage and streaming service Stream which has made it possible to create and share screen recordings with or without webcam videos. Here are some of the key features
No need to download any software. Simply record directly from a browser like Google Chrome.
Records your screen, audio, and your webcam.
Stores files in OneDrive. Videos are ready as soon as your are done recording.
Can have captions automatically generated with a transcript.
Can add chapters to make it easier to find sections of the video.
Can be embedded in a Blackboard page.
I find this tool really useful for giving video guidance to people who email with me questions that are easier to demonstrate than to give written instructions. I simply do a quick recording, grab the share link, and paste it in an email.
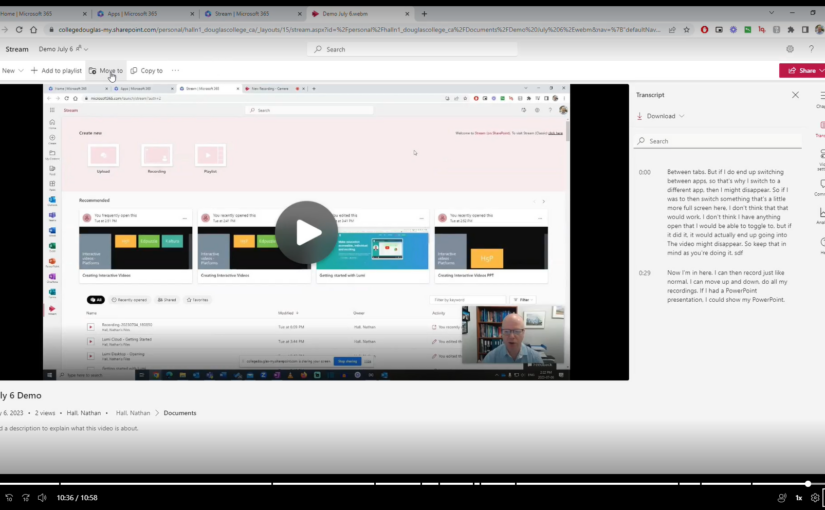
Here is a video on how to use it. You can also use the chapters to skip around.
Microsoft recently made some changes to Outlook online to make it easier to create a personal booking page. This is a way for people to book time with you using your Outlook calendar. They do not see your calendar, but they will see the times you are available inside the windows of time you set up. It is a great way for you to create office hours or to have a way for colleagues to find time to meet with you.
As we start a new semester, it is time once again to think about how we are welcoming our students to the school and into our classrooms. One way to do this is through a welcome email before the class starts. You may also consider adding a link to a welcome video to give students a chance to see and hear you before the start of the term. The easiest way to do this is through uploading and sharing the video from OneDrive. This video will take you through the steps on uploading, changing the settings, and getting a shareable link. The video is an example of this since it is hosted on OneDrive.
Over the past few months, you have likely heard about the worldwide paper shortage that is affecting the ability of Douglas College to procure paper for printers and photocopiers. Staff, faculty members, and students have all been asked to reduce the amount of paper they use.
Yesterday, I was having a conversation with another faculty member about the frustrations we are all encountering as we attempt to find creative ways to complete reading and writing tasks in our classes. I started sharing some of the ways I was able to reduce the amount of paper I was using in my writing class and I thought it might be good for me to write up something to share with everyone.
This post is not meant to be an exhaustive list of ideas, but simply some ways I have made this work and also some plans on what I will be trying out in the future. Feel free to share your ideas in the comments.
The most common way I have them use Forms is to display the QR code from the form on the screen at the front of the class and students then work individually or in pairs/groups to complete the task. After they are done, I share the results on the screen, and we debrief together. Students found it simple to do and I found it easy to create. A win/win.
Student notebooks📒
Instead of photocopying things for students, think about possibly displaying things on the slides at the front of the class and then have students work in a simple lined-paper notebook which they can purchase for cheap from almost anywhere. I did this quite a bit with my students. If I wanted to keep a copy of their work for providing feedback, I would use my tablet or phone to take a photo of it and then upload the photo to Blackboard so I could give them my feedback. Some students also just took the page out of their notebook and gave it to me.
Larger printouts in groups📃
Some of the best activities this past semester involved printing a simple structure (i.e., a graphic organizer) on 11×17 sheets of paper. I would only print out one per group, which usually meant I only had to print out about 5-6 sheets total. Students would do their work in groups directly on the larger paper and then I would have them post the sheets around the room for other groups to view and provide comments. I would sometimes take photos of those and post those on Blackboard for review.
Computer labs🖥️
If I needed each student to have access to a writing task, I would book a computer lab for them to do the work individually. I could then make use of Blackboard and Office 365 to create their work and have others review it.
Whiteboards🖊️
I use the whiteboards in the classroom a lot. I bring in a few pens and have students work in groups right on the whiteboard. This obviously doesn’t work for longer tasks, but it does work for shorter writing and response activities.
Blackboard Ultra🤳
As Blackboard Ultra becomes available to all faculty, students and faculty will find its more mobile-friendly approach much better for completing in-class activities. You could have groups, or even individuals, complete shorter tasks on their phones and other mobile devices using things such as discussion forums and assignments. I plan on making good use of this in the Fall.
I hope that gives you a few ideas on how you can reduce the number of photocopies and printouts you use with your students. Feel free to reach out to ask questions or for help.
One tool I make use of quite a bit in my in-person and synchronous classes is the cell phone. I realize some instructors would rather have students stay off their phones, but I talk with my students about being present in the class which means they leave the class (virtually) when they are on social media or chatting on their phones with friends. Instead, I have students participate in activities using online tools such as Microsoft Forms. This post isn’t meant to be a step-by-step instructional guide to using Forms. Instead, I want to share some ways in which I use forms in my classes and how you might make it work for you as well.
Ranking Question
This is one of my favourite uses for forms in my classes. I have used it my ELLA, Student Success, and TESL courses. Here are some examples of how I put it to use:
In my lowest-level ELLA writing course, we are working on paragraph structure. I took an eight-sentence paragraph that had a topic sentence, supporting sentences with transitional keywords, and a concluding statement and I mixed up the sentence order. Students in groups in class worked together on their phones, tablets, or computers to put the paragraph into a logical order. I only needed one response per group, so I had them designate a leader to post the responses on behalf of the team. Once each group has submitted their response, I then review it together as a class. Forms provides a graph showing the order of the sentences based on a calculated total of all responses. This shows the average response for the entire class. Later, I can review each group to see which group had difficulty with the exercise. Here is an example you can try for yourself along with the graph I would show to the class:
In my TESL course, I had them work through the order of a sample lesson plan that had been mixed up. In this situation, there were multiple ways of doing things, but there were three main blocks that needed to go in a certain order. The items within those blocks could be ordered differently. When we reviewed together, I wanted to show the three main blocks and how they were important. Again, we did this on phones, tablets, or computers in pairs or groups and only one response needed per group.
In my Student Success course, I had students put things in the order they found easiest to most difficult for them. The topics were based on problems students encounter during their first year in college. They discussed these as a group, but responded individually on their phones, tablets, or computers. We reviewed the average responses as a class.
Paperless Practice Activities
I use the text question option a lot in my forms. This allows students to share their ideas or answers in various ways. I’ve used it with APA reference writing practice, discussion style questions, and problem-solving questions. It is often done in pairs or groups with a review at the end with the whole class. It is one of the simplest ways of reducing paper use in my courses.
QR Codes
While you can share a form with students with a link they can click on, Microsoft Forms also creates a QR code for each form that you can share with students and they can scan with their phones or tablets. There are two ways I use QR codes in my classes.
I will often download the QR code for the form and paste it as a full-screen image in my slides. Students can then scan it on their phones or tables and start working on it in class. Having students working pairs or groups helps with situations where some students might not have a phone or tablet. Only one person per pair or group needs to scan the QR code and they submit the responses on behalf of the group. I use this in almost all of my classes. Students are so used to doing this since it was a common practice during the pandemic to access information.
I have also created a scavenger hunt using QR codes. I create a form for each task I want them to perform in the scavenger hunt and then I download and print the QR code. I paste those QR codes around the campus in areas where I think they should get to know such as Student Services, the fitness centre, and The Learning Centre. I try to hide the QR codes a little bit to make it a bit more challenging and to make sure other people don’t find them and remove them. When students scan the QR code, they get a question about the area and they need to submit their answer. They get a customized thank you message that gives them the next clue. They do this in pairs and when everyone is done, we review the answers as a class and I sometimes give prizes for the most correct answers. I don’t give prizes for the fastest completed since some students might have mobility issues and take longer to complete. I also want them to work through the answers instead of just getting it done. This activity takes some time to set up, but my students have mentioned how much fun it is and I know they at least know what some of the key areas of the college are and where they are located. It is really good for newer students to the college. I also provide students with link to the campus guide they can use to help them locate the places based on the clues.
Student-Created Forms
Since each student has access to Office 365, they also have access to Microsoft Forms. That means they can create forms as part of their work for the class. They can also invite others to work on the form with them by getting the Share to Collaborate link and sharing that with their partner(s). In one of my classes, students were assigned a study skill to research such as exam preparation, notetaking, and time management. As part of the assignment, they needed to do their own research study by creating a form they would use to gather data from students across Douglas College. They would then take that data and create an infographic they would share with their classmates and even the college (we put them up in the hallway). They needed to create both open and closed questions which could then be used in different ways in the report and the infographic.
Rating Question
You can add a rating question to your form to check in with students on how things are going. This is helpful as an exit ticket before them leave for the day to see how confident they are about what they learned that day. It can also be used as a way of midterm check-in to find out what has been working and what hasn’t in the course so far.
Most of the tools within the Douglas College Office 365 accounts store their data and files within the user’s OneDrive account. This makes it easy for the user to copy files from one area to another. One tool that does not store their files in OneDrive is Microsoft Forms [Note: some data may be stored in OneDrive, but the main form or quiz is not]. Whenever a user creates a form or quiz in Microsoft Forms, the form is only stored online. This means the user needs to find another way to copy the file if they want to use it with another account. This could be when someone leaves Douglas College and wants to keep a copy of their forms and quizzes created using their Douglas College Office 365 account. The user can create a free Microsoft account and then copy any forms or quizzes they want to keep into that free account. It is not a difficult task, but it does require the user to do it one form or quiz at at time.
This is also useful when one user wants to share a template of the form or quiz with another user. This might be an instructor who has created a form or quiz that another instructor teaching the same course could use in their own class. It might even be the same user wanting to create a copy for a different section of the course.
Here is how you can copy a form or quiz to another acccount.
Open the form or quiz you want to copy.
In the top-right corner, click on the three dots.
Click on Collaborate or Duplicate.
Under Share as a template, click on + Get a link to duplicate.
Paste the link into the address bar, and hit return/enter on your keyboard.
Click on Duplicate at the top of the screen.
You will be asked to log into an account. Log into the account in which you want to copy the form or quiz.
Once you are logged in, it will create a copy and you will now see the new copy on your screen.
If you have more than one form to copy, don’t close the private/incognito tab. Simply go back to the other window where your original form is located and start the process again with the next form. You can simply toggle back and forth between your two accounts in separate windows this way.
Here is a video demonstrating these steps using Google Chrome (no audio – only text guides)
As part of our Douglas College access to Microsoft Office 365, you can install the full office programs (Word, PowerPoint, Excel, etc.) on your computer for free. This is available to everyone in the college with a Douglas College email: staff, faculty, and students. Once you install these programs on your computer, you can activate the full program by logging in with your Douglas College credentials (email and password). This opens up the full features of each program instead of the limited features of the online versions.
Installing Microsoft Office 365 on your Mac
Click on the image above to watch the video on how to install the office apps on your Mac
Installing Microsoft Office 365 on your Windows computer
Here is how to download and install Office 365 on your Windows computer.
Log into your Douglas College Office 365 & Email.
Click on the Install Office button in the top-right corner and choose Office 365 apps
Run the install that downloads.
When prompted, use your Douglas College email and password to log in.
Click on the image above to access the recording from the session.
Thank you to everyone who was able to attend the session last Wednesday on Office 365 and Blackboard. The recording can be found by clicking the title slide above. The slides can be located here.
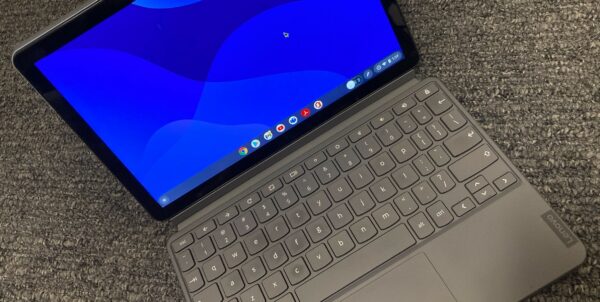
With more and more students using Chromebooks to do their work, you may find they will need a little help with completing certain tasks. I recently purchased a Chromebook I can use to support you and your students as much as I can. I will create support document and videos whenever I find something that might be helpful to share. Here are two videos to get you started. I recorded these for students, so feel free to share the links to the videos with them.
Due to some issues with Kaltura, students may not be able to upload videos using Google Chrome. For regular desktop and laptop computers, this isn’t a real issue. With Chromebooks, there is a way to install the Android version of Firefox for most newer models.
Please let me know if you or your student have any questions about using Chromebooks for doing classwork or completing assignments.
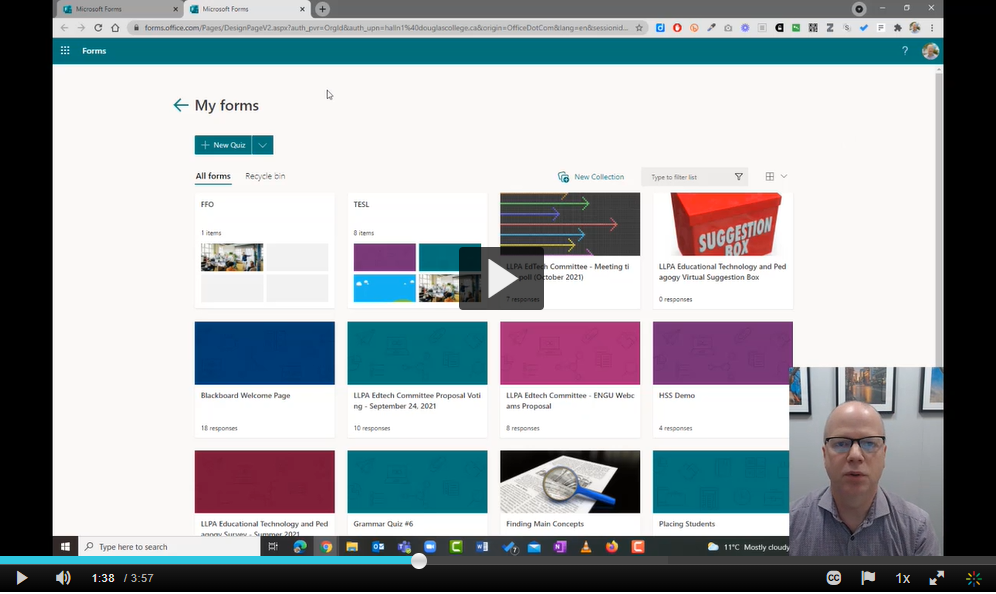
One of my favourite tools in Microsoft Office 365 is Forms. I use it in my courses, my committee work, and anywhere else I need to collect information from people. It is a straightforward tool to use and has only gotten better over the years.
One of the main complaints I have had with Forms is the lack of ability to organize forms into folders. Thankfully, Microsoft has listened to us and has added Collections to Microsoft Forms.
Click on the image above to learn more in this 4-minute video.